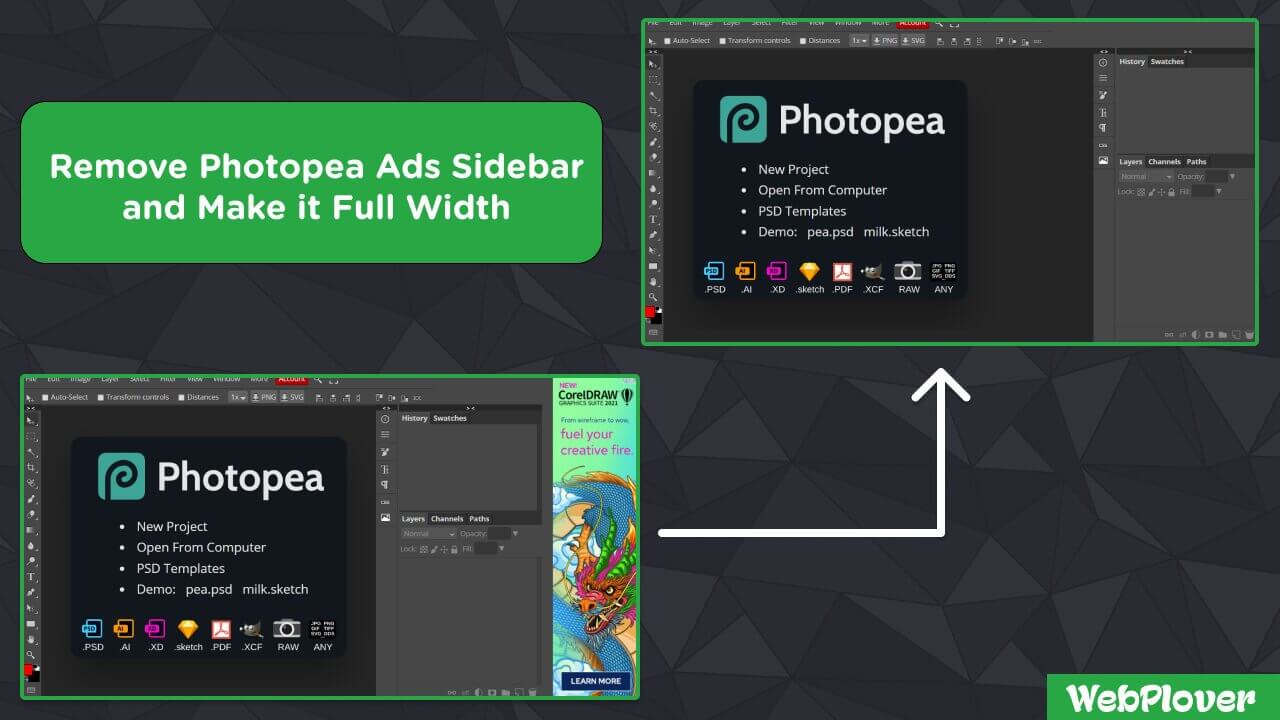
How to Remove Photopea Ads Sidebar and Make it Full Width
In this article, I will share a trick to remove advertisement banners and the sidebar containing ads completely from photopea.com, a web-based solution to to edit your photos in real time like Photoshop.
In short, you will be able to use photopea.com without ads sidebar with full-width edit screen experience
We will use this trick and implement it on these three major web browsers:
- Google Chrome
- Microsoft Edge
- Mozilla Firefox
Let’s get started…
Google Chrome & Microsoft Edge
Step 1 : Go to photopea.com right click and select inspect
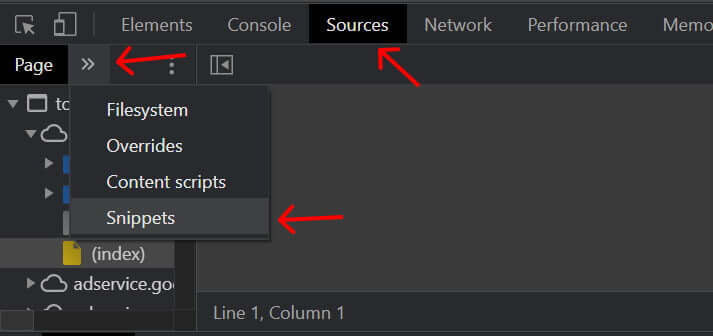
Step 2: Go to Sources ➜ Snippets ➜ create a New snippet and name it photopea (You can name it anything)
Step 3: Copy this code snippet and paste it over there and sava the snippet using CTRL + S (in windows) or Command + S (in Mac)
document.head.insertAdjacentHTML(
  "beforeend",
  "<style>.app > :first-child,.panelblock.mainblock{flex: 1 !important}body > div.flexrow.app > div:nth-child(1) > div:nth-child(3){width:100% !important}</style>"
);

document.querySelector(".app > :last-child").remove();

const hk_canvas_body = document.querySelector(
  ".panelblock.mainblock > .block > .body"
);

const hk_panelhead = document.querySelector(".panelblock.mainblock .panelhead");

const hk_canvas = document.querySelector(".panelblock.mainblock .pbody canvas");

function hk_photopea() {
  hk_canvas_body.style.width = "100%";
  hk_canvas.style.width = "100%";
  hk_panelhead.style.maxWidth = "100%";
}

hk_photopea();

new MutationObserver((x) => {
  for (let y of x) {
    if (y.type === "attributes") {
      hk_photopea();
    }
  }
}).observe(hk_canvas_body, {
  attributes: true,
});
Step 4: Right click on your snippet and click on Run. Boom, that’s all.
Note: Your snippet will save in your browser but you will have to re-run it every time you refresh your current browser window.
Mozilla Firefox
Step 1 : Go to photopea.com right click and select inspect
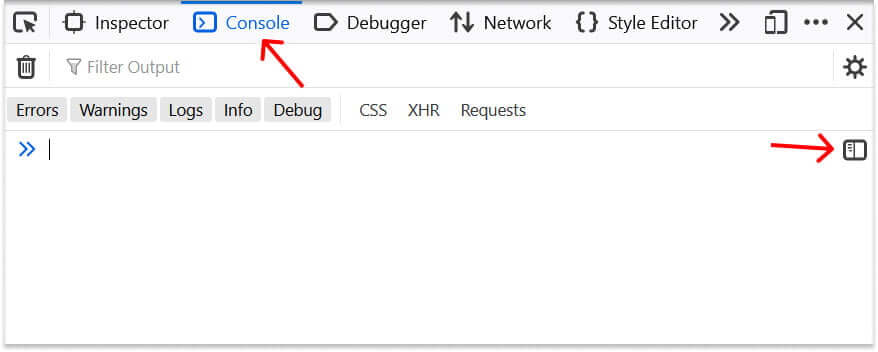
Step 2: Go to Console click on book icon to switch to multi line editor
Step 3: Copy this code snippet and paste it over there, then click on Run
document.head.insertAdjacentHTML(
  "beforeend",
  "<style>.app > :first-child,.panelblock.mainblock{flex: 1 !important}body > div.flexrow.app > div:nth-child(1) > div:nth-child(3){width:100% !important}</style>"
);

document.querySelector(".app > :last-child").remove();

const hk_canvas_body = document.querySelector(
  ".panelblock.mainblock > .block > .body"
);

const hk_panelhead = document.querySelector(".panelblock.mainblock .panelhead");

const hk_canvas = document.querySelector(".panelblock.mainblock .pbody canvas");

function hk_photopea() {
  hk_canvas_body.style.width = "100%";
  hk_canvas.style.width = "100%";
  hk_panelhead.style.maxWidth = "100%";
}

hk_photopea();

new MutationObserver((x) => {
  for (let y of x) {
    if (y.type === "attributes") {
      hk_photopea();
    }
  }
}).observe(hk_canvas_body, {
  attributes: true,
});
Note: Unlike Google Chrome and Microsoft Edge, there is no option in Mozilla Firefox to save your snippet and use it later. So you will have to paste this code every time you refresh your page.
Watch out this video tutorial to have a visual grasp on the topic…
Thanks for this, much needed 🙂
It does not work properly. Thw working area did not get bigger. 🙁
Google Chrome
Please, somebody check it.
https://i.imgur.com/K9iXyOy.png
Thx
Thanks to inform, I updated the code snippet. Please use the updated code.
Hi!
Thx for ur effort!
It looks great at splash screen, but after start a new project, there will be an empty bar.
https://i.imgur.com/yiGzrjI.png
I can’t fix it, cause i’m underqualificated, so im appreciated for your effort.
Almost ok.
At spalsh screen looks great, but when i want to work there will an empty bar between the work area and right toolbar.
https://i.imgur.com/yiGzrjI.png
Could u fix it?
Thx
try right clicking a layer, the dialogue comes up in wrong place.
try using a brush, it paints wrong spot